Master the setup of Android Studio Narwhal 2025.1.2 with this in-depth, step-by-step tutorial. Learn how to download the official IDE, configure the SDK, and launch your first app. This comprehensive guide, inspired by Prof. Dr. Zeeshan Bhatti’s lecture, is perfect for every aspiring developer.
Download and Install Android Studio Narwhal 2025.1.2 on Windows 11
Welcome to the World of Android Development!
Welcome, future mobile application developers! This is a pivotal moment in your journey, because, without a doubt, setting up your Integrated Development Environment (IDE) is the foundational first step. In this comprehensive and casual guide, which is based on the teachings of Prof. Dr. Zeeshan Bhatti, we will meticulously walk through the entire process of downloading and installing the latest and greatest version of the official Android IDE: Android Studio Narwhal 2025.1.2.
Consequently, you might be asking: why is this setup so crucial? Well, the Android Studio IDE is, quite simply, your digital workshop. It’s the place where you will write code in Kotlin or Java, design beautiful user interfaces, debug your logic, and ultimately test your creations on a virtual or physical device. Moreover, the ‘Narwhal’ version brings exciting new features, such as enhanced support for Jetpack Compose, improvements to the build system, and even more sophisticated tools like the embedded Layout Inspector. Therefore, understanding the installation process completely will prevent frustrating errors down the line and ensure a smooth start to your learning.
Section 1: The Download Process (Getting Android Studio Narwhal)
Our journey begins, naturally, with acquiring the necessary software. The process is straightforward, but it requires a careful and precise approach to ensure you get the official, secure file.
Step 1: Visiting the Official Source for the Latest Version
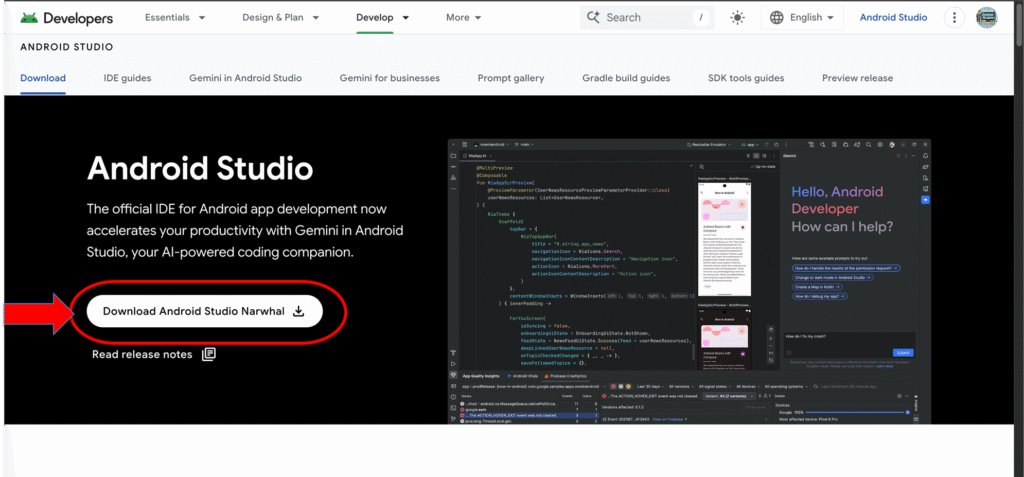
The very first action you must take, without exception, is to navigate to the official source for the IDE. Specifically, you should open your web browser and enter the following URL: https://developer.android.com/studio. This is the one and only trusted repository for the Android Studio download package.
In addition, it is important to verify that you are downloading the correct and most current version. As of this lecture, the target is Android Studio Narwhal 2025.1.2, which is part of the “Feature Drop” releases and represents a significant upgrade from earlier versions. Furthermore, the download page automatically detects your operating system (Windows, macOS, or Linux) and offers the appropriate executable file (e.g., an .exe file for Windows). Always double-check that the operating system selection matches your current machine.
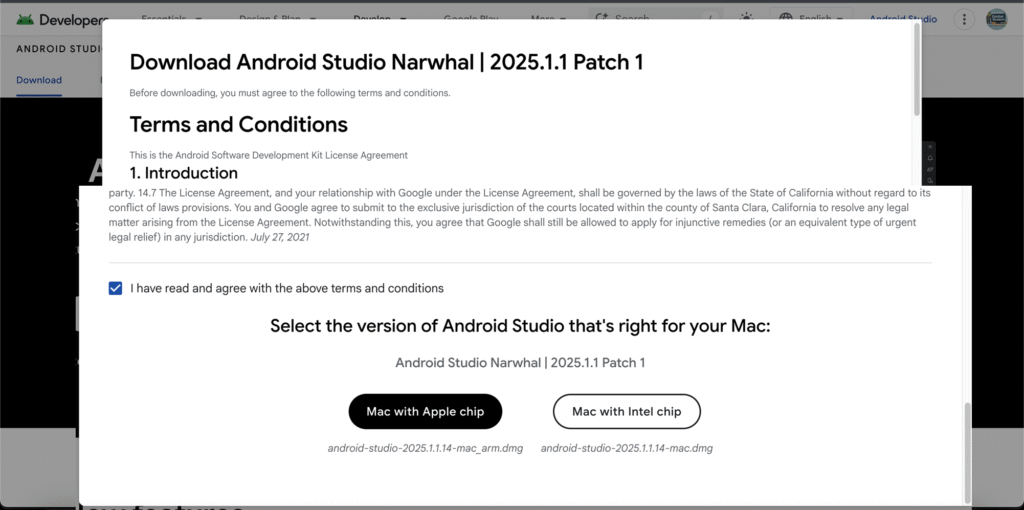
Step 2: Accepting the Terms and Conditions (T&C)
Once you’ve identified the correct download button for your platform, you will undoubtedly be presented with the Android Software Development Kit (SDK) License Agreement. Consequently, this step is mandatory. You simply cannot proceed to the download without first acknowledging and accepting the terms and conditions set forth by Google.
Therefore, take a moment to read the core tenets of the agreement. It outlines the legal framework for using the SDK, which includes the Android system files, packaged APIs, and Google APIs add-ons. Ultimately, by clicking to accept and proceeding with the download, you are agreeing to be legally bound by this contract, whether you are acting on your own behalf or on behalf of an employer or other entity. Once this formality is complete, the download button will become active, and you can initiate the file transfer.
Step 3: Saving the Installation File
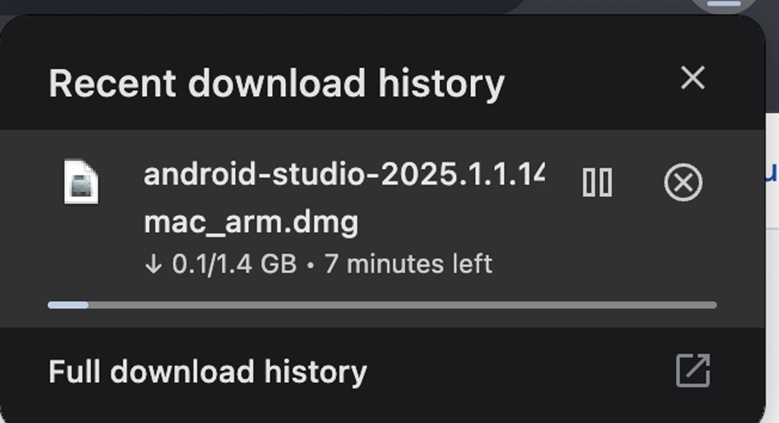
After successfully agreeing to the terms, the download will commence. However, this is a large file, so the time it takes will vary depending entirely on the speed of your internet connection.
In addition, as the download begins, your browser will prompt you to choose a save location. Therefore, it’s a best practice to save the file in a location that is easily accessible, such as your ‘Downloads’ folder or a specific ‘Software’ folder that you have created. Furthermore, it’s wise to keep this installer file for a brief period after installation, just in case you need to re-run the setup for any reason. Consequently, once the download is complete, you are officially ready to move into the second, more hands-on phase: the installation itself.
Section 2: The Installation (Setting Up Your Development Environment)
With the Android Studio installation file safely on your hard drive, we now pivot to the core setup process. This section requires attention to detail, as the choices you make here determine the capabilities of your development environment.
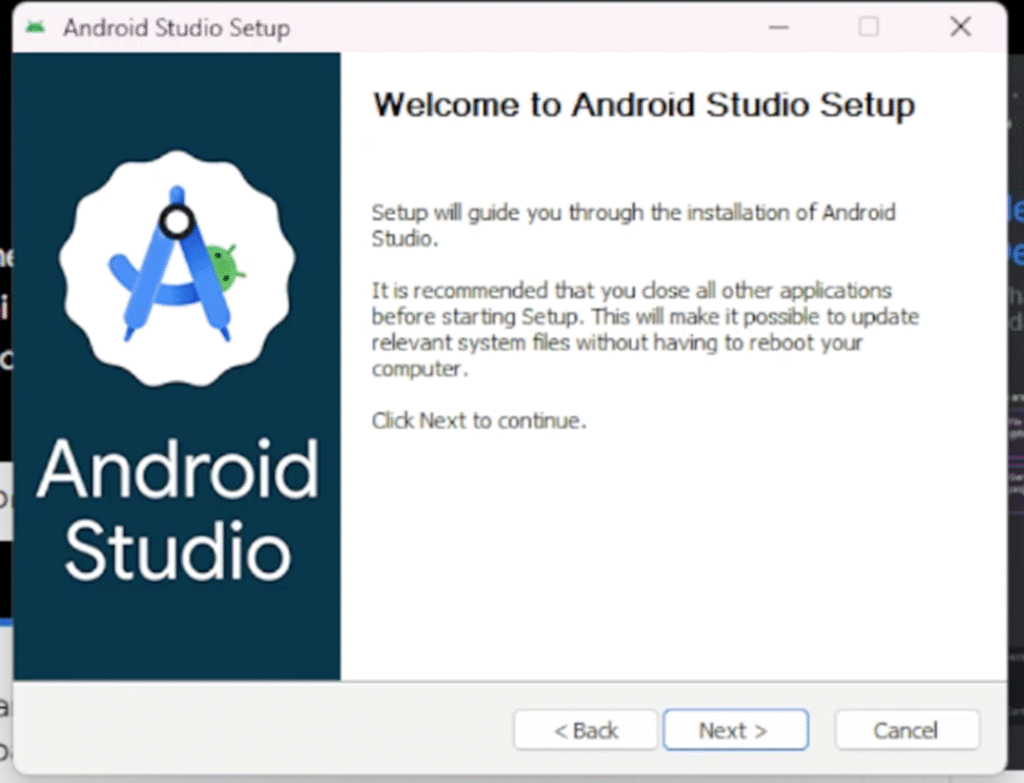
Step 4: Launching the Installer and Initial Setup
To begin the installation, simply locate the downloaded executable file (e.g., android-studio-2025.1.2.exe) and double-click it. Consequently, this action will launch the Android Studio Setup Wizard, which is a graphical tool designed to guide you through the process. The first screen will typically welcome you to the setup and verify that you have administrative privileges to continue.
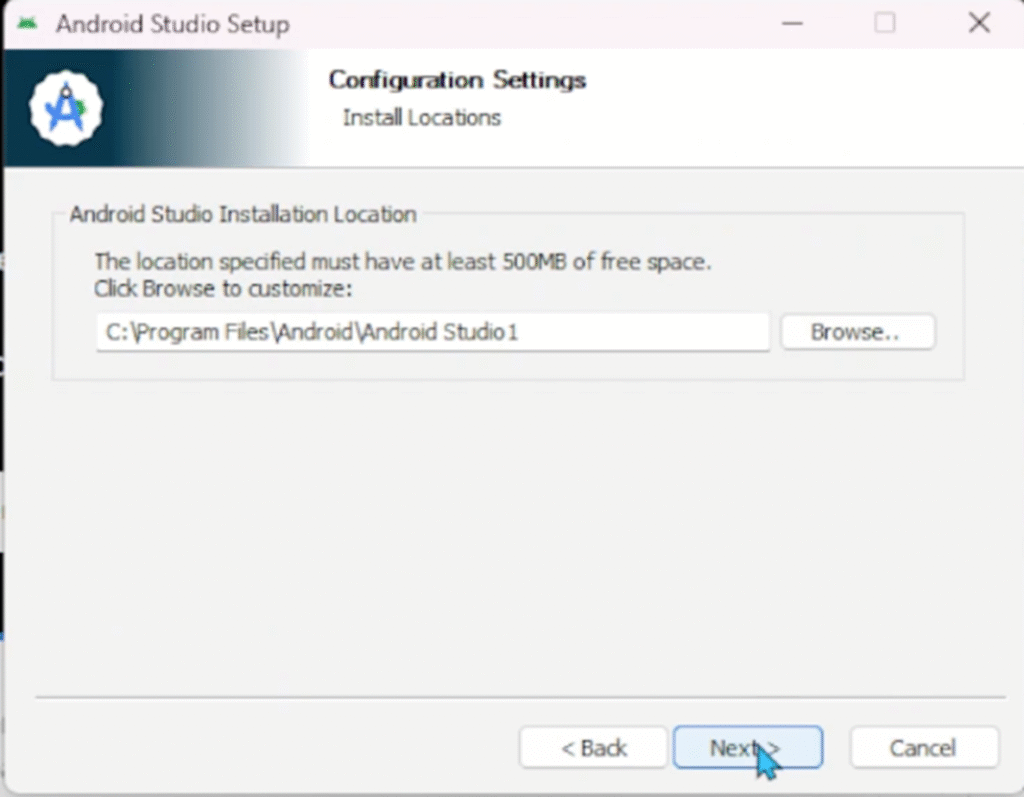
Moreover, the initial screens will ask you to confirm the installation location. The default path is generally acceptable and is highly recommended unless you have a specific reason to change it (e.g., limited space on your primary drive). Specifically, the wizard will then prompt you for the components you wish to install. This leads directly to our next critical step.
Step 5: Customizing Installation Components
This step allows you to select which essential components you need installed alongside the IDE itself. Therefore, pay close attention to the available options. The two main components, which should almost always remain checked, are:
- Android Studio (The Application): This is the core IDE.
- Android Virtual Device (AVD) / Emulator: This allows you to run and test your apps on a simulated Android device right on your computer. Furthermore, having the emulator is critical for testing compatibility across different Android OS versions.
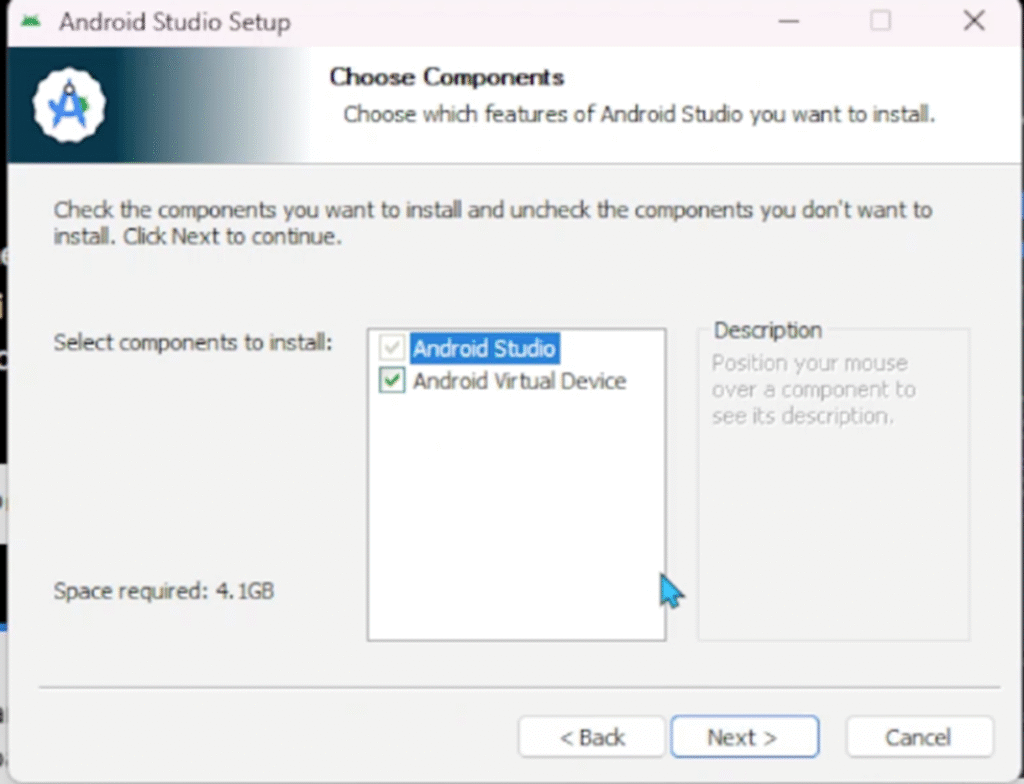
In addition, the Java Development Kit (JDK) is often bundled with the latest versions of Android Studio, eliminating the need for a separate installation. However, if you are running an older system or a custom setup, the wizard may prompt you to verify or download the appropriate JDK version. Ultimately, confirming these component selections and clicking ‘Next’ is the main barrier to entry.
6: Setting the SDK Location
The Android Software Development Kit (SDK) is arguably the most vital part of your setup. Specifically, the SDK is a collection of tools, libraries, and necessary packages that are tailored specifically for Android development. Therefore, the setup wizard will ask you to designate a location for the Android SDK.
Furthermore, while the default location (usually in your user profile folder, such as C:\Users\YourName\AppData\Local\Android\Sdk on Windows) is perfectly fine, it is paramount that you know and remember this path. Consequently, this path is crucial for manual configurations, command-line operations, and even linking other development tools in the future. Moreover, ensure that the drive you select has ample space, as the SDK folder will grow significantly as you install more Android platform versions and tools.
Step 7: Configuring the Emulator/Virtual Device (AVD)
If you chose to install the Android Virtual Device (AVD) component in Step 5, the wizard will then guide you through the initial configuration of a default AVD. Nevertheless, even if you skip this step, you can always create, edit, or delete Virtual Devices later using the dedicated Device Manager inside Android Studio.
Specifically, the wizard may prompt you to select a hardware profile (e.g., Pixel 8) and an Android system image (API level) for the default emulator. Therefore, it is wise to select a recent and popular device/API level to begin. Furthermore, if your system supports hardware acceleration (like Intel HAXM or AMD Hypervisor), the installer will likely prompt you to enable it for significantly faster emulator performance. Consequently, optimizing this setting now will save you a lot of time later when testing your application.
Step 8: Completing the Setup Wizard
After all the component and location selections, the setup wizard will display a summary of your choices. Ultimately, this is your final opportunity to review the settings before the main installation process begins.
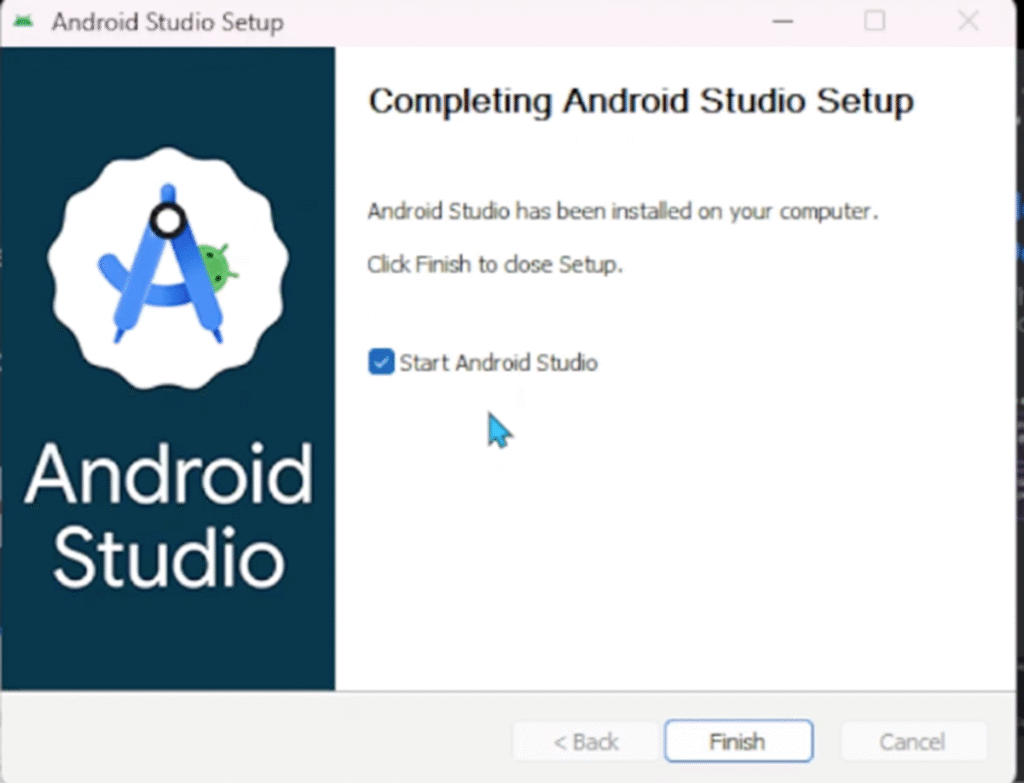
Therefore, once you click ‘Finish,’ the installer will begin extracting and configuring all the chosen files. This process includes downloading and setting up the SDK platform and tools, and this, too, can take several minutes. Consequently, this is a fantastic time to grab a cup of tea or coffee, as suggested by the official Google codelabs. Once the progress bar is complete and the ‘Installation Complete’ message appears, you have successfully set up your development environment.
Section 3: The First Run (Launching Your First Project)
The installation is complete, and the excitement is mounting! Now is the moment we transition from setup to actual creation.
Step 9: Running Android Studio for the First Time
To launch the IDE, you should now find the Android Studio icon on your desktop or in your applications folder and double-click it. However, on the very first run, Android Studio may perform some final configurations, such as indexing files and downloading any remaining dependencies. Consequently, this might take a minute or two, but it is a normal and necessary process.
The first screen you see will be the Welcome to Android Studio dialog. Furthermore, if you’ve never used the IDE before, your primary option here will be New Project. Therefore, click on New Project to start the process of creating your very first application.
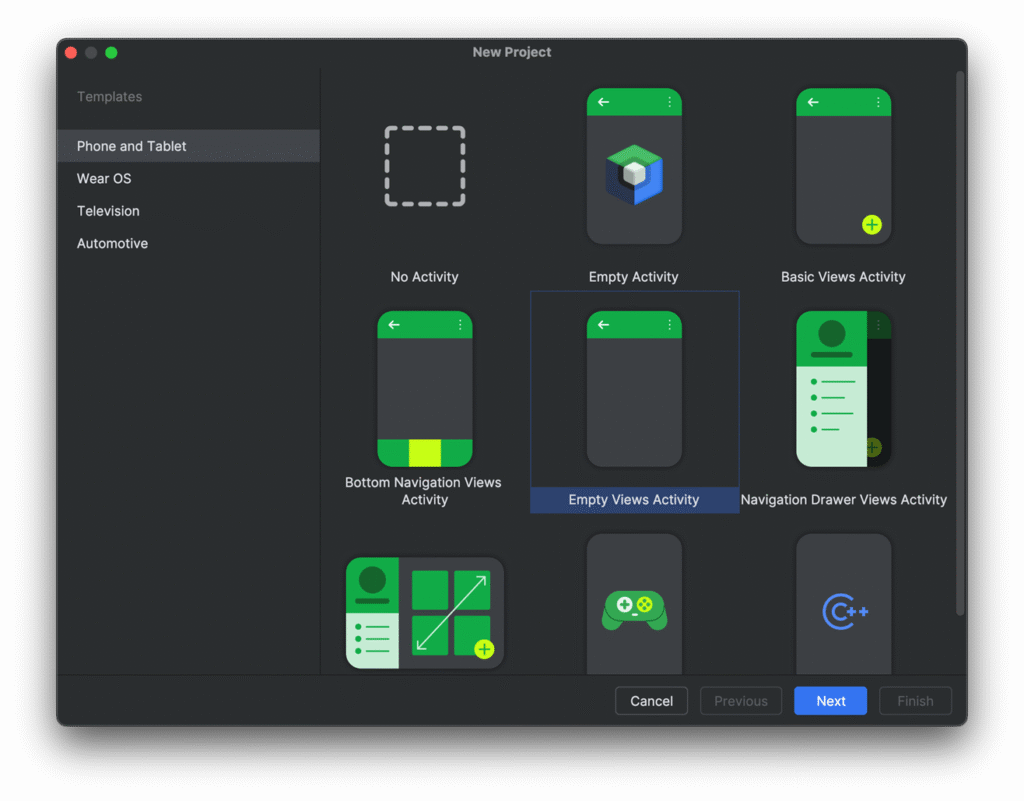
Step 10: Creating a New Project
Clicking ‘New Project’ opens the ‘New Project’ wizard. Specifically, this screen presents you with a variety of Project Templates categorized by the device form factor (Phone and Tablet, Wear OS, Android TV, etc.). Consequently, for almost every beginner’s first application, the best choice is the Empty Activity template under the ‘Phone and Tablet’ tab.
In addition, the Empty Activity template provides the simplest blueprint for a modern Compose or View-based application. Furthermore, it includes the basic files and project structure you need to display a simple “Hello Android!” message, making it the perfect starting point for learning. Therefore, select ‘Empty Activity’ and click ‘Next’.
Step 11: Configuring Project Details
This is where you give your app its identity. Therefore, you will be prompted to fill out several critical fields:
- Name: This is the human-readable name of your application that will appear on the device’s home screen. For instance, you could enter “My First Narwhal App“.
- Package Name: This must be a unique identifier for your app across the entire Google Play Store ecosystem, following a reverse domain name convention (e.g.,
com.example.myfirstapp). Consequently, leaving the default is fine for a learning project, but you must change theexamplepart to a unique domain if you plan to publish the app. - Save Location: This is the directory where the entire project’s source code and resources will be stored.
- Language: You will choose between Kotlin (the preferred, modern language) and Java. It is highly recommended to select Kotlin to start your journey.
- Minimum SDK: This determines the lowest Android OS version your app will support. Specifically, a lower API level means your app can run on a larger percentage of existing devices, however, it limits the modern APIs you can use. Ultimately, the wizard will show you a handy chart to help you choose; selecting a version like API 24 (Android 7.0 – Nougat) or later is often a good balance.
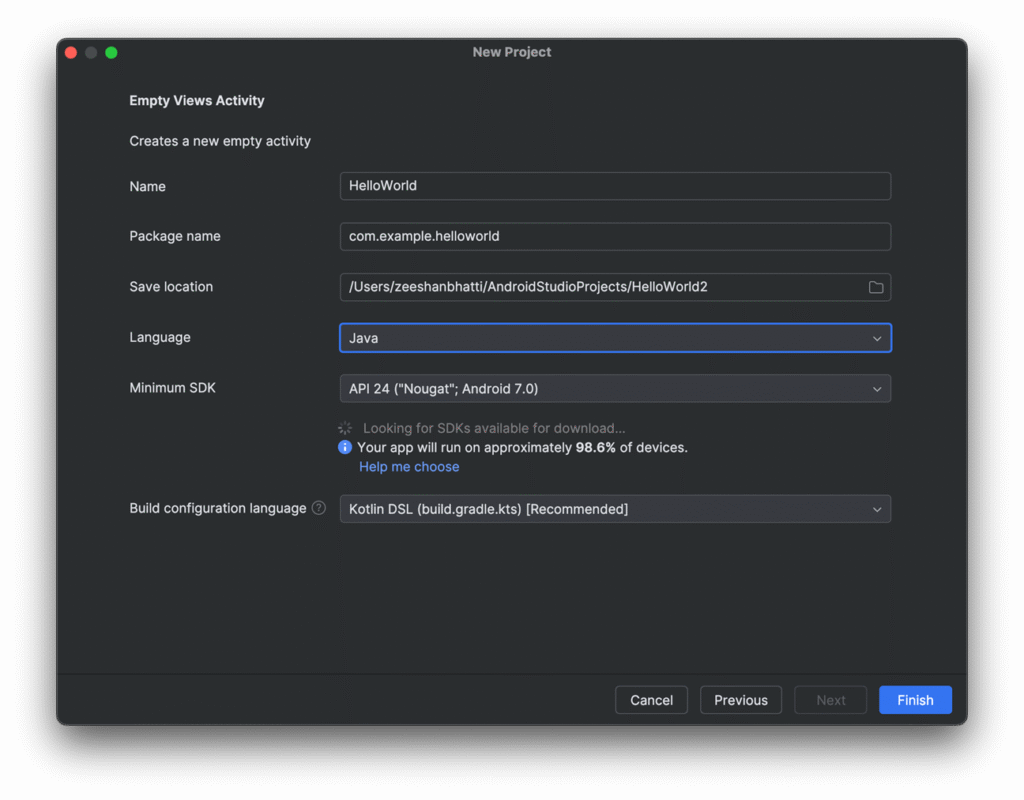
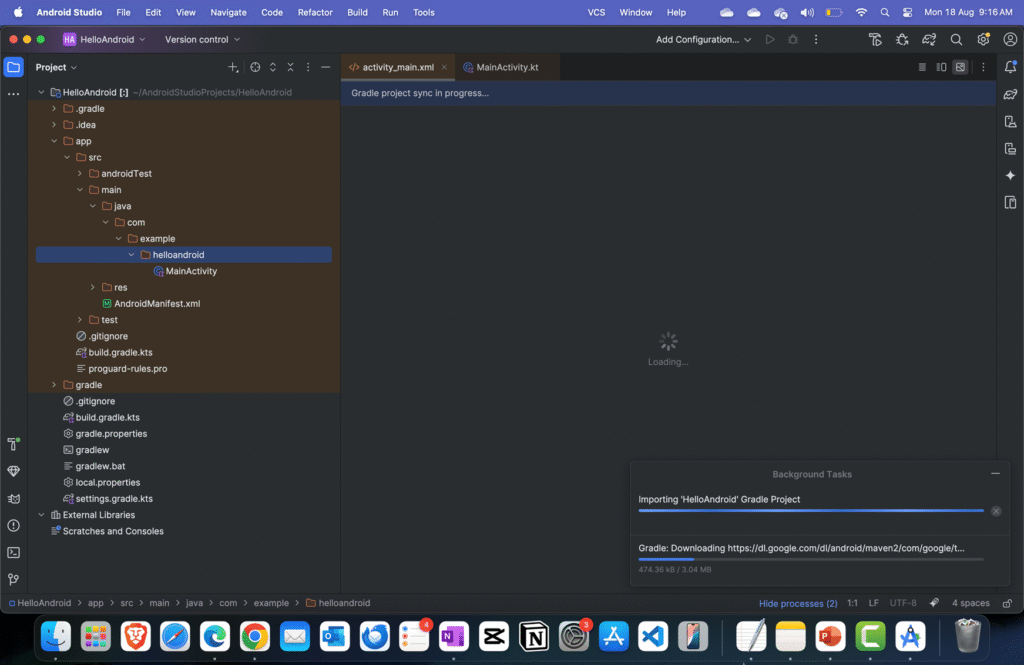
Once all these details are set, click Finish. Consequently, Android Studio will take a moment to generate your project files, synchronize Gradle, and open your new development workspace.
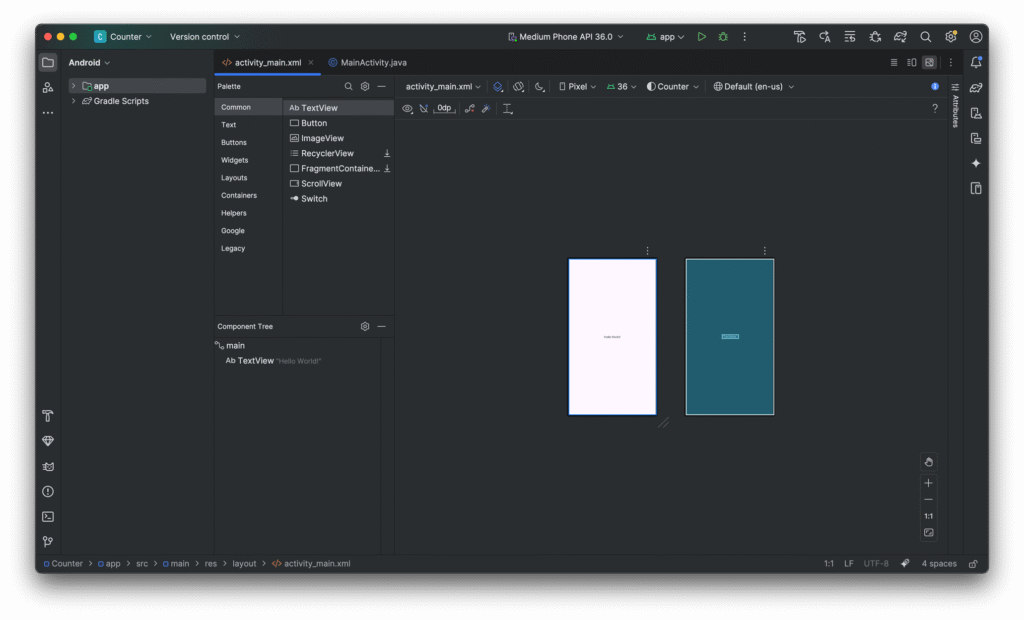
Step 12: Exploring the IDE (Project View and Editor)
Congratulations! Your Android Studio environment is now fully operational, and your first project is open. Therefore, you will see the main Integrated Development Environment (IDE) window, which is logically divided into three primary areas:
- Project View (1): Located on the left, this pane shows the file structure of your entire project. Specifically, you’ll see the
appmodule, themanifestfile, thejava/kotlinsource code folder, and theres(resources) folder, which contains your layout XML files, images, and strings. - Code/Editor View (2): This large central area is where you will spend most of your time writing and editing code (e.g.,
MainActivity.kt) and designing your user interface (e.g.,activity_main.xml). - Design/Preview View (3): When viewing a layout file (like
activity_main.xml), this area will either show a visual preview of your design or allow you to enter the Split View, which is highly recommended for working on layouts, as it shows both your XML code and the design in real-time.
Ultimately, you now possess the fully configured toolkit to begin your journey in mobile application development, ready to follow the next steps in your lecture series.
Conclusion: Your Development Journey Begins Now
You have successfully navigated the entire process: from downloading the official Android Studio Narwhal 2025.1.2 installation file to configuring the necessary components like the SDK and AVD, and finally, launching your very first project. Furthermore, you now understand the importance of each step, from accepting the licensing terms to selecting the appropriate Minimum SDK.
Consequently, this meticulous setup is the cornerstone of a successful and error-free learning experience. The “Narwhal” version is packed with powerful new features, making this an exciting time to start developing. Therefore, as you move forward in your studies under the guidance of Prof. Dr. Zeeshan Bhatti, you can be confident that your development environment is robust, up-to-date, and ready for you to create amazing mobile applications. Now, let’s explore some frequently asked questions that commonly arise during this essential setup process.
FAQs (Frequently Asked Questions) on Android Studio Narwhal 2025.1.2 Setup
Q1: What are the minimum system requirements to run Android Studio Narwhal 2025.1.2 smoothly?
- A: This is a critically important question, since a sluggish development environment can severely impact your learning experience. Therefore, while the official requirements may vary slightly, generally speaking, you should aim for the following: 8 GB of RAM is the recommended minimum, though 16 GB or more is highly preferred for smooth operation, especially when running the Android Emulator. Furthermore, you’ll need at least 4 GB of free disk space for the IDE and SDK, and moreover, an SSD (Solid State Drive) is strongly recommended over a traditional HDD for dramatically faster build times and general performance. Ultimately, a modern Intel or AMD processor with support for hardware acceleration (required for the AVD) is also essential.
Q2: What is the difference between the Android Studio IDE and the Android SDK?
- A: Consequently, this is a common point of confusion for beginners. The Android Studio IDE (Integrated Development Environment) is the application you see and interact with—it’s the code editor, the visual designer, the project manager, and the debugger. In contrast, the Android SDK (Software Development Kit) is a set of tools, libraries, and platform-specific code packages that the IDE uses to build your app for a specific Android version (like Android 14 or 15). Therefore, you can’t build an app without both: the IDE is your workbench, and the SDK contains the building materials and tools.
Q3: Why is it recommended to use Kotlin over Java when starting a new project in Narwhal?
- A: Specifically, while Android Studio allows you to select either Kotlin or Java, Kotlin is the modern, preferred language for Android development. Consequently, Google officially declared Kotlin as the preferred language for Android developers. Furthermore, Kotlin is a safer, more concise language than Java, requiring less boilerplate code, and moreover, it is fully interoperable with existing Java code. Therefore, starting with Kotlin ensures you are learning the language that the modern Android framework is designed around, leading to a more efficient and enjoyable development experience.
Q4: I encountered a “HAXM not installed” or a “VT-x/AMD-V not enabled” error during setup. What does this mean?
- A: This is a very common issue and it relates directly to the speed of your Android Virtual Device (AVD). HAXM (Intel) and AMD-V/VT-x (general virtualization technology) are hardware acceleration features that allow the emulator to run at near-native speed. However, if these are not enabled, the emulator will run extremely slowly, if at all. Therefore, you must enter your computer’s BIOS/UEFI settings (by pressing F2, F10, or DEL during startup) and ensure that Virtualization Technology is explicitly enabled. In addition, you may need to check that no other virtualization software (like Hyper-V on Windows) is conflicting with the HAXM installation. Ultimately, solving this issue is vital for practical app testing.
Q5: How do I update to a newer version of Android Studio once I have Narwhal 2025.1.2 installed?
- A: Fortunately, updating Android Studio is a simple, built-in process. Therefore, you do not typically need to re-download the entire installer file. Specifically, once Android Studio is open, navigate to the main menu and select Help > Check for updates (or Android Studio > Check for updates on macOS). Consequently, Android Studio will check its servers for any new patch releases or stable feature drops (like the next version after Narwhal). Furthermore, if an update is available, you will be prompted to download and install it directly within the IDE, which is a much faster and more streamlined process.