Week-1 Lecture-2 Simple Button App
INFT-516 – Mobile Application Development

(Source: Slide1.png)
This session, designated as Week 1, Lecture 2 of the INFT-516 Mobile Application Development course for the BS(Information Technology) Part-III, 2nd Semester, is led by Prof. Dr. Zeeshan Bhatti. The primary objective of this lecture is to introduce students to fundamental Android development concepts by building a practical ‘Simple Button Event App,’ which focuses on handling user input and updating the UI dynamically.
⚠️ Unauthorized distribution of this content is strictly prohibited ⚠️.
(Source: Slide2.png)
A strict copyright notice is enforced regarding all course material, including slides, notes, videos, and associated content, which remains the intellectual property of Dr. Zeeshan Bhatti, Copyright © 2025. Students are reminded that unauthorized reproduction, storage, transmission, or distribution of these copyrighted works, in any form or by any means, is strictly prohibited without explicit written permission from the author. For all academic references or permission inquiries, contact information is provided at Bhatti.Zeeshan2241@gmail.com or via the official website.
Create Your FIRST APP
(Source: Slide3.png)
Section 1 of the session begins the hands-on process of creating the first functional mobile application. This segment guides developers through initializing the development environment and laying the foundational structure necessary to build the simple counter application, adhering to the standard project structure copyrighted for this course.
1.Create New “Empty Views Activity” Project
(Source: Slide4.png)
The first technical step in Android Studio involves initiating a new project by selecting the ‘Empty Views Activity’ template. This template provides the essential starting components—a single activity and its corresponding layout file—which serves as the most appropriate and clean baseline for developing simple applications that rely on traditional XML layouts and Java logic.
2. Provide New Project Name and Select Java As Language
(Source: Slide5.png)
During the project configuration stage, developers must provide a unique name for the application and crucially select Java as the primary programming language for implementation. This ensures consistency with the course curriculum and prepares the project structure for writing business logic in Java, while using XML for defining the UI layout.
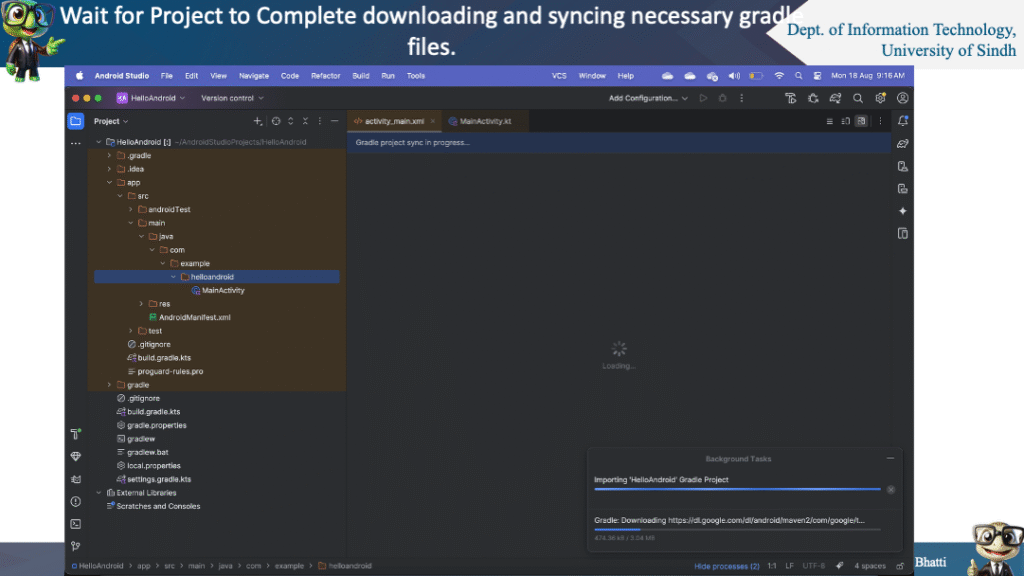
Wait for Project to Complete downloading and syncing necessary gradle files.
(Source: Slide6.png)
After initial configuration, the Integrated Development Environment (IDE) requires time to download and sync necessary Gradle files and dependencies. Gradle is the build automation system for Android, and this essential syncing process ensures that all required libraries, tooling, and project configurations are correctly resolved before development work can proceed, preventing build errors later on.
Once Android Layout UI synced , then you should see the Layout XML UI

(Source: Slide7.png)
Once the Gradle process is complete and the IDE has successfully indexed all components, the developer will be presented with the Layout XML User Interface (UI). This visual editor allows for the design and manipulation of the application’s visual elements, typically showing the contents of the `activity_main.xml` file.
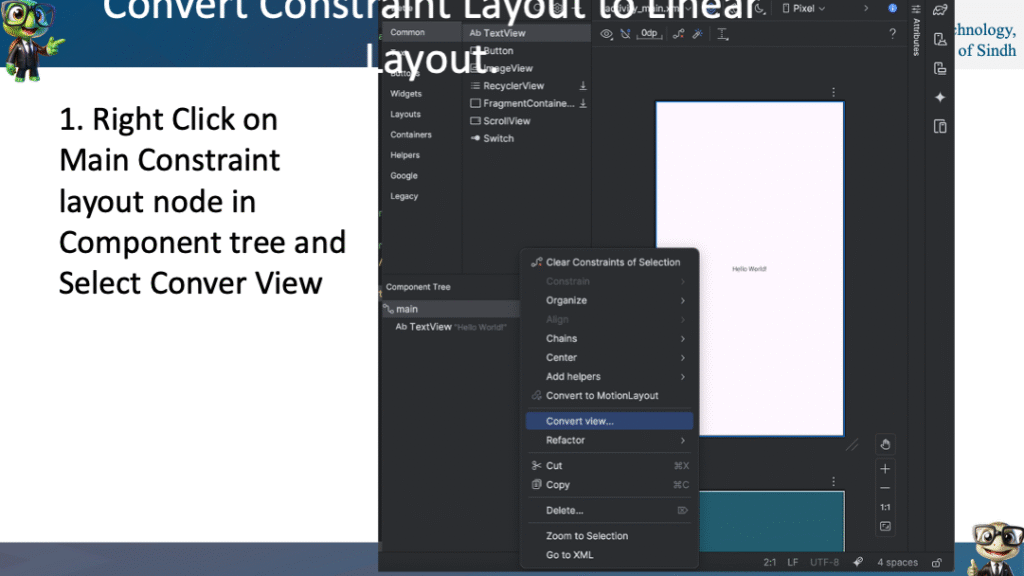
Convert Constraint Layout to Linear Layout.
(Source: Slide8.png)
A key design modification for simplicity involves changing the default root layout from `ConstraintLayout` to `LinearLayout`. This is achieved by right-clicking the main `ConstraintLayout` node within the Component Tree panel and selecting the ‘Convert View’ option, initiating the layout conversion process to a more straightforward, sequential layout model.
Select Linear Layout
(Source: Slide9.png)
Following the initiation of the conversion, the developer is presented with a pop-up window where they must explicitly select ‘Linear Layout.’ This action finalizes the switch, establishing the root container of the UI as a `LinearLayout`, which simplifies the arrangement of child elements either horizontally or vertically.
Change Attributes
(Source: Slide10.png)
With the `LinearLayout` established as the root, the next step is to access the Attributes Panel, usually located in the top-right corner of the IDE. This panel provides a detailed view of all editable properties for the currently selected UI component, which is crucial for customizing layout behavior and component appearance.
Change ‘Orientation’ to Horizontal
(Source: Slide11.png)
Within the Attributes Panel for the root `LinearLayout`, a critical modification involves setting the `android:orientation` attribute. Although the example later defaults to vertical stacking, the concept highlights the necessity of explicitly defining whether child views should be stacked vertically or laid out side-by-side horizontally, a core control mechanism of the `LinearLayout`.
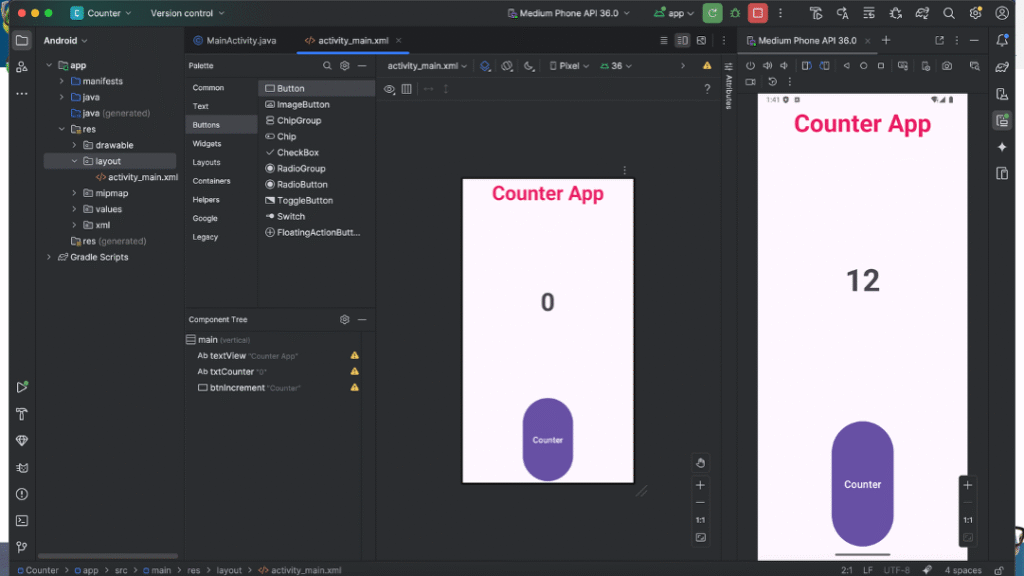
Create Counter APP UI
(Source: Slide12.png)
The practical phase of UI construction involves dragging and dropping the necessary UI widgets from the Palette onto the main activity layout. For the counter application, this primarily entails adding two `TextViews` (one for the title and one for the counter value) and one `Button` (to handle the increment event), thus creating the visual structure of the app.
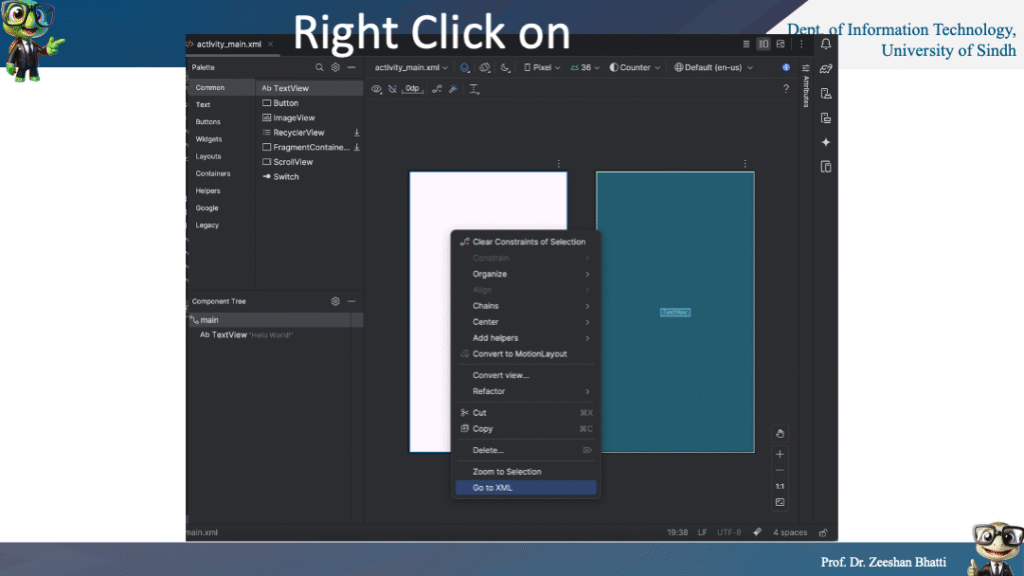
Right Click on
(Source: Slide13.png)
The ‘Right Click on’ instruction typically refers to initiating a context-sensitive menu action within the Android Studio environment, commonly used on components in the Component Tree or in the Code Editor to access options such as converting views, extracting strings, refactoring code, or accessing specific attribute settings.
(Source: Slide14.png)
This XML code block details the final configuration of the root `LinearLayout`, showing that it spans the full width and height of the screen (`match_parent`), centers its contents (`android:gravity=”center”`), and, most importantly, arranges its children vertically (`android:orientation=”vertical”`), thereby providing the basic scaffolding for the counter application elements.
(Source: Slide15.png)
This subsequent XML snippet adds the core components of the Counter App UI within the vertical `LinearLayout`. It includes a large, bold `TextView` displaying the application title (‘Counter App’), a second large `TextView` (`@+id/txtCounter`) initialized to ‘0’ to display the current count, and a final `Button` (`@+id/btnIncrement`) labeled ‘Counter,’ ready to be hooked up to the Java logic for event handling.
(Source: Slide16.png)
This stage represents the pivotal transition from the visual definition of the User Interface (XML) to the functional implementation of the event handling logic in Java. The focus shifts to defining variable declarations and finding the XML components (using `findViewById`) within the `MainActivity.java` file.
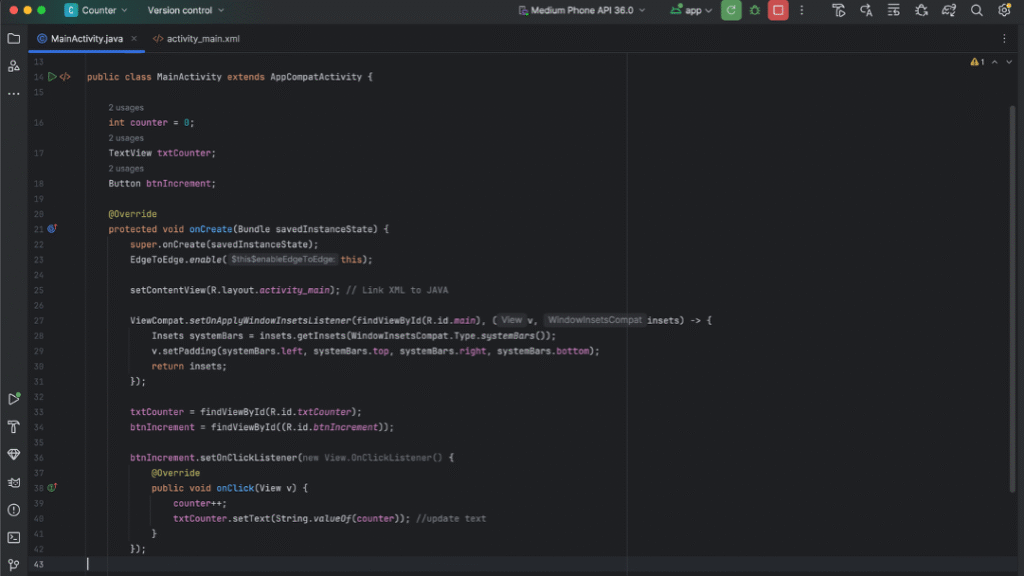
(Source: Slide17.png)
The next step involves implementing the core functionality: defining the integer variable to hold the counter value and setting up the `OnClickListener` for the increment button. This listener will contain the logic to increase the counter variable and update the content of the counter `TextView` every time the button is pressed.
(Source: Slide18.png)
This concluding phase of the practical development involves testing the application, ensuring that the button click successfully executes the event handler, increments the counter variable, and correctly reflects the new value on the screen, thus confirming the successful creation of the simple button event app.
End of Session
(Source: Slide19.png)
This marks the end of Week 1’s Mobile Application Development session. Students have successfully set up their first Android project, understood the structure of XML layouts, converted layouts for simplicity, and prepared the foundational UI elements necessary for implementing event-driven logic in the next phase of the course.